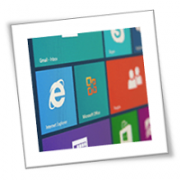
Windows 11 is the new kid on the block. It looks sleek and modern, and many users are tempted to upgrade to the latest Microsoft operating system (OS). But should you make the switch? Here are five reasons why you may want to stick with Windows 10 for now.

1. Your computer doesn’t meet Windows 11 minimum system requirements

One of the main reasons that can keep you from upgrading to Windows 11 is that your computer might not be able to run it. Windows 11’s system requirements are quite high: your computer needs 1 gigahertz (GHz) or faster with two or more cores on a compatible 64-bit processor or system on a chip (SoC). It also needs at least 4 gigabytes (GB) of RAM and 64 GB of available storage.

Although these standards aren’t extraordinary, a considerable number of users have outdated hardware that doesn’t meet Microsoft’s requirements for Windows 11. If you are one of them, you may need to purchase a new PC to get the latest OS.

2. Windows 11 has a lot of bugs

Windows 11 is still fresh out of the oven, and it’s far from being bug-free. Users have reported compatibility issues, missing notifications, and some built-in applications not opening or working as expected. The OS is still missing some features available in Windows 10, and issues are constantly being discovered and fixed, but these are to be expected of any newly released OS. So if you want to stick with a stable and reliable OS, it’s better to wait until Windows 11 is more mature.

3. You can’t access Android apps directly from Windows 11 (yet)

The Your Phone app currently lets Android phone users access mobile apps directly from their Windows 10 PC. This is an especially useful feature for remote and hybrid employees, as the ability to access phone apps on a larger desktop or laptop display and use a mouse, pen, or touchscreen helps with multitasking. If you are one of the people who rely on this feature, you’ll have to wait for the next Windows 11 update to get this functionality.

4. Windows 11 is very similar to Windows 10

Windows 11 wasn’t intended to be a new version of the OS. It was meant to be a substantial update to Windows 10, initially called the Sun Valley Update. That’s why save for a few features, many apps and functions look and work the same in Windows 11 as they do in Windows 10. So unless you’re looking for something radically different from what you have now, it may not be worth upgrading.

5. Microsoft will continue to support Windows 10 until 2025

If you are comfortable with your current setup and don’t have any urgent need to upgrade, you might as well stick with Windows 10. Microsoft has stated that it will continue to support the OS until October 14, 2025. This means that Windows 10 won’t become obsolete in the near future, so you can still enjoy bug fixes, security updates, and new features for this OS version for a few more years.

These are just some of the reasons why you may want to stick with Windows 10. If you decide that upgrading to Windows 11 is right for you, go ahead! But if not, there’s no need to worry — Windows 10 will still be here for a while. Either way, our experts can help you make the most out of your Windows setup. Give us a call today to learn more.

If you are looking for an expert to help you find the best solutions for your business talk to GCInfotech about a free technology assessment

Published with consideration from TechAdvisory.org SOURCE

You may not know it, but some of the websites you visit or apps you download leave a trackable digital footprint. One step you can do to avoid leaving your online behavior exposed to third parties is to use private browsers to surf the internet.

What is private browsing?

Your web browser — whether it’s Chrome, Edge, Firefox, Safari, or Opera — stores the URLs of the sites you visit, cookies that track your activity, passwords you’ve used, and temporary files you’ve downloaded.

This can be convenient if you can’t remember your login details or if you’re trying to recall a website you visited a few days ago. The feature also helps speed up the loading time of websites you frequently visit. But if someone else uses or gains access to your computer, your most private internet activities are exposed for that user to see and exploit.

Private browsing is a feature known by various names across different browsers. For instance, it’s called Incognito Mode in Chrome and InPrivate Browsing in Edge. When you use this feature, the browser does not record your browsing history, passwords, and temporary files. Instead, all this information is discarded as soon as you close the browser. You’re also instantly logged out of all accounts you accessed using the private window, which comes in handy when you’re using a public or shared computer.

Furthermore, tracking cookies are not stored when you surf the internet with a private browser. Such cookies are small bits of data used to identify your computer. Sites like Facebook use cookies to know your preferences based on your online behavior, such as which sites you visit. By doing this, they can personalize the ads on their platform, ensuring that the ads you see are for products and services you’re likely to take interest in.

What are the limitations of private browsing?

Although private browsing prevents your web browser from storing your data, it doesn’t stop anyone from snooping on your online activities in real time. If your computer is connected to the company network, system administrators can still track what you’re browsing, even if you’re in Incognito Mode.

Also, if spyware or keylogger malware is installed on your computer, hackers will still be able to see what you’re doing online. Even though private browsing has quite a few benefits, you shouldn’t solely depend on it for online privacy. Instead, you should use a virtual private network (VPN) when you go online. This tool encrypts your internet connection and prevents anyone from intercepting your data. And don’t forget to use a strong anti-malware program to scan your computer and keep spyware and other malicious web monitoring software at bay.

If you want to know where you can get these solutions or learn more about web browser security, call us today. We have the tools and expert advice you need to prevent anyone from snooping on your internet browsing.

If you are looking for an expert to help you find the best solutions for your business talk to GCInfotech about a free technology assessment

Published with consideration from TechAdvisory.org SOURCE

Businesses of any size can fall victim to ransomware. How will you protect your small business from it? And can you afford it?

The Business of Chicago

One Monday morning, 35 workers of a Chicago business board of directors turned on their computers. They were met by a desiccated head popping up and demanding nearly a quarter-million in Bitcoin. Hackers had shut off their internet access. Their databases had been scrambled and rendered unusable.

This NGO had vital infrastructure but no skilled cybersecurity professionals or even a proper data recovery and business continuity strategy, much like thousands of other ransomware victims whose tales never reach the news.

Company management believed that its data and networks were secure until they experienced that dreadful Monday morning return to work. The company also lacked the financial wherewithal to pay the ransom.

Productivity loss is the biggest price tag paid by ransomware victims. In addition, they suffered the time-consuming job of controlling and cleaning up after the assault.

According to Proofpoint and the Ponemon Institute study, a ransom payment generally amounts to less than 20% of the entire cost of a ransomware attack’s interruption.

The staff at the Chicago organization discovered too late that their data recovery methods did not actually back them up. The organization labored over finding paper documents in order to recreate its records from the ground up.

Businesses In a Bind

Many smaller businesses believe they aren’t vulnerable to ransomware. That is very clearly not the case.

According to the National Cyber Security Alliance, small and midsized firms are the target of the bulk of cyberattacks, with up to 60% of them going out of business within six months of the ransomware assault.

Three Simple Steps to Defeat Hackers

Some may reasonably question, if a $44 billion firm like Accenture can fall prey to ransomware, what hope does a smaller company have?

Everyone requires a reaction plan if no one is immune to an assault. Consider the following three essential steps:

1. Provide cyber awareness training to all staff.

PEBCAC stands for “problem exists between computer and chair” in the world of cybersecurity.

Because email phishing is by far the most common threat vector for ransomware, the first line of defense is to teach all employees not to open unfamiliar attachments or clickbait links — “You’ve just won $1 million!” — and to protect their login credentials, preferably with two-factor authentication.

Some employees, believe it or not, still retain passwords on Post-it Notes stuck to their computer displays. Every employee in today’s networked remote workforce is a member of the security apparatus. Employees play an essential role in data protection. However, they must be given the correct knowledge and training.

2. Update all of your applications.

An inventory of operating systems and software is the first step in any threat assessment.

Updates defend a computer network from known security flaws. Additionally, you must properly maintain and configure every firewall and server to stay safe.

Unfortunately, this seemingly simple task of data governance is a big undertaking. It’s made considerably more difficult by the abundance of endpoints. Think smartphones, industrial systems, IoT devices, and all the equipment used by work-from-home staff.

3. Put backups and recovery strategies to the test.

This is the one step that many companies skip. You shouldn’t.

Pick a day, perhaps a Saturday, when everyone “pretends” to be victimized by a hacker. Test the reliability of your backups and the amount of downtime you can expect to endure should you fall victim to ransomware.

How You Can Recover

To recover from an assault, every firm needs dependable backups and, equally essential, a business continuity strategy. Form a cyber incident response team and conduct penetration testing to ensure the safeguarding of vital infrastructure. Be proactive rather than reactive in your cyber response.

No one is immune to assault. These are merely the beginning of your defenses.

Monitor network traffic in real-time. Otherwise, your organization is extremely susceptible. Mechanisms must be in place to detect and respond to intrusions before you suffer damage. Be aware that 100 percent prevention is neither cost-effective nor practical.

Virus Software

Virus software and firewall hardware have come a long way. However, at the end of the day, the greatest defense is a skilled cybersecurity team.

A monitoring and incident response control center will allow speedy data recovery, reducing downtime for both internal and external cyberattacks. Outsourcing a security operations center may help businesses with limited resources reduce their risk.

Consider the cost of business disruption as the first step in making systems more robust. Governments, utilities, and even IT corporations are all vulnerable to assault. Put a solid data security strategy in place. Without one, it’s not a question of if, but rather when hacking will occur.

Make sure your cloud storage is secure.  It’s imperative that you do so ASAP. Without this safeguard, all sorts of malware, such as ransomware, can run riot through your systems.

Are you interested in learning more about cybersecurity? Call us today and discover how our wide array of tech services can safeguard your business.

If you are looking for an expert to help you find the best solutions for your business talk to GCInfotech about a free technology assessment

Published with consideration from smallbusinesstechnology.com SOURCE

Can business printers get hacked? The short answer is yes. Anything that connects to your business network can be exploited by malicious actors on the internet, even innocuous machines like your printers. These can be exploited to steal data and/or create entry points into your system to launch larger attacks. So make sure you follow these tips to protect your work printer environment.

What makes business printers vulnerable to cyberattacks?

When assessing network security threats, companies primarily focus on servers and computers not only because these are the most exposed to external threats, but also because they get the bulk of cyberattacks. Printers are often at the bottom of the list since they are not prime targets. What’s more, their functions seem to be internal at first glance, as they don’t interact with external systems.

But it’s exactly because of their primary functions, namely printing and scanning, that make print devices perfect cybercriminal targets. Businesses run important documents such as tax forms, employee information, medical records, and financial statements through print devices — information that hackers would definitely love to get their hands on.

And they can, easily.

Network printers store previous print jobs in their hard drive, sometimes including those that have been canceled. If anyone accesses the printer — even remotely — they may be able to see those documents by hacking into the printer using a specialized tool.

Files can also be intercepted during wireless transmission, as modern printers can now be connected to the web. Not only can hackers exploit printers’ open network ports to view data, but they can also take over vulnerable printers and transmit their own data through these machines.

Lastly, hackers can exploit vulnerable printers to bypass your cybersecurity system. Once they find a way in through your printers, crooks can then launch broader cyberattacks from within your network, which can be difficult to contain.

What can you do to protect your business printers?

Business printers should not be disregarded when planning a cybersecurity strategy. Keep your print devices secure by following these best practices:

  1. Monitor your network surreptitiously and always promptly install printer software updates and patches. Printer manufacturers often release software support or updates, so always be on the lookout for those.
  2. Change the default password and administrator login credentials of printers with web management capabilities.
  3. Allow only company-owned devices to connect to your printers.
  4. Always connect to your printers using secure connections. Conversely, avoid accessing your printers through a public internet connection.
  5. Restrict printer access by using a firewall.
  6. If your wireless printer has a feature that requires users to enter a PIN before they can print documents, enable it to prevent unauthorized access.
  7. If you don’t use your printer for fax and email, isolate your printer from your main company network and disable out-of-network printing.
  8. If you handle classified data, do not connect your printer to any network. Instead, connect it directly to your computer using data cables or print from a thumb drive.
  9. Secure your printouts by enabling manual feed. This setting requires a user to manually input paper (or any material to be printed on), reducing the risks of the printed document getting stolen or being left in the printing area.

Another way to secure your printers is by partnering with an IT company that can take care of your printer-related worries. From thwarting attacks to reducing management costs to keeping your printer at optimal functionality, our experts can help.

Are you interested in learning more about cybersecurity? Call us today and discover how our wide array of tech services can safeguard your business.

If you are looking for an expert to help you find the best solutions for your business talk to GCInfotech about a free technology assessment

Published with consideration from TechAdvisory.org SOURCE

Microsoft Outlook comes with a raft of features that make managing your busy schedule and boosting your productivity easier. If you find Outlook’s myriad capabilities a little overwhelming, don’t worry — these tips and tricks will have you using Outlook like a pro in no time.

Organize your inbox

Is your Outlook inbox getting a little too cluttered for your liking? Use the Clean Up feature to tidy up your inbox.

From your inbox, click the Home tab and choose from one of three Clean Up options:

  • Clean Up Conversation – reviews an email thread or a conversation and deletes redundant messages
  • Clean Up Folder – reviews conversations in a selected folder and deletes redundant messages
  • Clean Up Folder & Subfolders – reviews all messages in a selected folder and any subfolders, and deletes redundant messages in all of them

Ignore conversations

Besides redundant messages, group conversations that aren’t relevant to you can clutter up your inbox. The Ignore button helps you organize your inbox and focus on relevant emails.

To activate this feature, select a message, then click Home > Ignore > Ignore Conversation. Alternatively, you can open a message in a new window and click Ignore under the Delete function. You can easily revert this action by going to the Deleted Items folder and clicking Ignore > Stop Ignoring Conversation.

Send links to files

This function is especially useful when you need to send large files to your coworkers or clients. You can send a link to the file instead of the file itself as well as set permissions to allow recipients to edit and collaborate on linked files in real time.

To do this, upload the file you wish to send to OneDrive. Then from the message box, click Attach File > Browse web locations > OneDrive.

Tag contacts

To get the attention of a specific person in a group email or meeting invite, use the @Mention function. This works particularly well for emails sent to multiple recipients or if you want to convey the urgency of your message.

In the body of your email or invite message, type the @ symbol followed by the name of the person you want to tag (e.g., @johndoe). Doing so will highlight the name in the message and automatically add it to the To line of your message.

You can also search for messages you’re tagged in by selecting Filter Email from the Home tab, and then clicking Mentioned.

Add notes to emails

With Outlook, you can add sticky notes to specific parts of an email. To add a sticky note, simply drag your cursor to highlight your chosen text in the email, and then release the mouse button to trigger a pop-up object menu. On that object menu, select Add Note. This will open a OneNote feed within Outlook, where you can add text or images to your sticky note.

Schedule a Teams meeting

Teams is Microsoft’s unified communication and collaboration platform, and it includes the Outlook add-in. This feature allows you to set up Teams meetings directly from Outlook. It also lets you view, accept, or join meetings while in either app.

To schedule a Teams meeting on Outlook, follow these steps:

  1. Switch to the calendar view on Outlook. Click the New Teams Meeting tab.
  2. Add individual participants or entire contact groups to the Required or Optional fields.
  3. Type in the topic, start time, and end time of the meeting. There’s no need to add the dial-in phone numbers and conferencing IDs to the invite, as Outlook does this automatically for you.
  4. Create a message inviting the recipients to the meeting, then click Send.

Share emails to Teams

With Outlook, you can easily share an email from your inbox directly to a specific Teams channel. To do that, follow these steps:

  1. Select the email you want to share.
  2. Click the Share to Teams button.
  3. On the Share to Microsoft Teams pop-up menu, type the name of the person or channel you want to share to. Check the “Include attachments” tickbox if you want to include the email’s attachments.

These are just some of the things you can do to improve your Outlook experience. For more on how to get the most out of Outlook and other Microsoft products, drop us a line today.

If you are looking for an expert to help you find the best solutions for your business talk to GCInfotech about a free technology assessment

Published with consideration from TechAdvisory.org SOURCE

Windows 11 has an attractive new look and some of the niftiest features ever seen in previous iterations of the operating system. These include the new placement of the Start button, improved security, Microsoft Teams’ Chat integration into the taskbar, a more personalized Widgets feed, and much more. Some users, however, would have liked to see certain Windows 10 features and capabilities brought over to the latest OS.

Customizable taskbar

In Windows 10, users can move the taskbar from its default horizontal position to the right or left edge or the top of the screen. In Windows 11, the taskbar stays at the bottom and there’s no option to customize its dimensions. Although the taskbar is commonly kept at the bottom of the screen, some users may want to change its position for different reasons.

Additionally, there’s no longer an option to move the Date and Time on the taskbar. In Windows 10, users can move Date and Time, which is placed in the right-hand corner of the taskbar’s System Tray area, by toggling off Clock in Settings. Some users may be perfectly fine with the default taskbar settings, but others might prefer greater customizability.

Drag and drop

Also absent in Windows 11 is the ability to drag and drop a file on your desktop into a program on the taskbar. In Windows 10 and earlier versions, you can drag, say, an Excel document saved on your desktop onto the Excel icon on the taskbar, and it will open. You can’t do this anymore on Windows 11. Users can also no longer drag and drop/save a file or any program onto the taskbar.

Live Tiles

The Start Menu in Windows 11 comes with new features, mainly a refurbished design, the “Pinned” icons, and a “Recommended” section. But gone are Live Tiles, previously available in earlier Windows versions, beginning with Windows 10. Those who’ve updated to Windows 11 will get the new “Widgets” features in place of the Live Tiles, but the latter serves an entirely different function.

Easier activation

To activate Windows 11 Home, users must have a Microsoft account, a 64-bit processor, and an internet connection. These are part of Microsoft’s minimum system requirements to activate the OS — on top of the need for a device with at least 4 GB of memory and 64 GB of storage.

On one hand, this can be useful. For one, business users signing into Windows with their Microsoft account automatically backs up their files through the company’s OneDrive storage device. However, for many users who don’t have a Microsoft account yet, it would be a lot easier not to have to connect a Microsoft account (or create one) when activating Windows 11.

Cortana integration

Cortana is a much less popular counterpart to the more established voice assistants of Apple (Siri), Amazon (Alexa), and Google (Google Assistant). But people who’ve gotten used to Windows’ very own assistant, which is integrated into Windows 10, might feel let down that Cortana is no longer part of the system setup nor can it be found within the Start Menu. Note, however, that the Cortana application is still available. You can find and enable it in Settings > Apps > Apps & Features > Cortana.

Internet Explorer support

To a lesser extent, some Windows 11 users will be disappointed by the absence of Internet Explorer, which will cease to receive support from June 15, 2022 onwards.

Faster shutdown

The slow shutdown of PCs running on Windows 10 is commonly attributed to Windows system files or corrupted drivers. Users would have liked to see faster shutdowns in Windows 11, but alas, that is not the case. Wake-from-sleep and restart times also remain unenhanced.

Windows 11 is not going to please everyone, but its other new functions will nevertheless please others. If you want to maximize all that the new OS has to offer, give our team a call. Our IT professionals would be more than happy to make your new system work for you.

If you are looking for an expert to help you find the best solutions for your business talk to GCInfotech about a free technology assessment

Published with consideration from TechAdvisory.org SOURCE

Many small- to medium-sized business (SMB) owners fail to prepare for major crises like flood and ransomware attacks. Disaster events can cause downtime, which can result in lost revenue and lower profits. In addition, SMBs that fail to recover quickly from disruption face the risk of losing their customers to their competitors. To prevent this from happening to you, it’s important to have a business continuity plan (BCP) in place.

What is a BCP?

A BCP is a predefined set of protocols on how your business should respond in case of an emergency or natural disaster. It contains contingency plans for every aspect of your organization, including human resources, assets, and business processes.

Key threats to business continuity

Various types of threats can affect SMBs such as:

  • Natural disasters: These are natural phenomena such as floods, storms, earthquakes, and wildfires.
  • Man-made disasters: These include cyberattacks, intentional sabotage, and human negligence.
  • Equipment and utility failures: These include unexpected power failures, internet downtime, and disruption of communication services.

How to build an effective BCP

If your company does not have a BCP in place, now is a good time to create one. These steps will help you formulate an effective BCP that will ensure your company keeps running even during a major crisis.

  1. Perform a risk assessment
    To create an effective BCP, it’s important to identify the risks to prioritize. Start by identifying potential threats that may impact your daily operations. List down as well industry risks, geographical area, rising trends, and issues that your stakeholders may encounter. Next, categorize the risks based on the level of impact, likelihood of occurrence, or other criteria.Once risks have been identified and a plan has been developed, carefully identify any possible gaps. Collaborate with your team to identify any weak points in the plan, and make changes as necessary.
  2. Perform a business impact analysis (BIA)
    A BIA will help you determine how a disruption can affect your company’s current functions, processes, personnel, equipment, technology, and physical infrastructure. IT will also help you calculate the potential financial and operational loss from each function and process affected.
  3. Identify your recovery options
    Identify key resources for restoring your business to minimum operational levels. Some recovery options you can take include using data backups, allowing employees to work from home or operating from a secondary location.
  4. Document the plan
    Make a record of the BCP and store the document in a secure location, preferably an off-site one to reduce the risks of loss or damage in case of a disaster.
  5. Test and train
    Once your BCP is in place, your continuity team needs to perform tests regularly to identify gaps and make necessary changes to ensure the plan’s effectiveness. They also need to conduct regular employee training so that everyone knows their respective roles should a disaster strike.

Having an effective BCP is a great way to ensure your business can quickly recover after a major disaster. If you’re thinking about creating a BCP for your company but don’t know where to start, give us a call today.

To learn more about how to safeguard your business, or if you are looking for an expert to help you find the best solutions for your business talk to GCInfotech about a free technology assessment.

Published with consideration from TechAdvisory.org SOURCE

Most tech companies, such as Microsoft, collect certain information about their users so they can provide better, more personalized experiences. However, these companies also often use the data they gather for advertising purposes. The good thing is that as a Microsoft user, you have a fair amount of control over your own privacy. In fact, you can disable Windows 10’s intrusive privacy settings — here’s how.

Turn personalized advertising off

Windows 10 assigns each user an “advertising ID” that is used for ad personalization based on your recent browsing history. If you’d rather see generic ads targeted to you based on demographics rather than your ID, we recommend turning this feature off. Here’s how to do it:

  1. Click on the search box at the bottom left of your screen. If your search bar is hidden, right-click the taskbar and select Search > Show search box.
  2. Next, type in “Privacy,” then click on Privacy Settings and select General.
  3. Turn off the option that states “Let apps use advertising ID to make ads more interesting to you based on your app activity.”
  4. Lastly, open your web browser and go to this link. Once there, turn off the “Personalized ads wherever I use my Microsoft account” and “Personalized ads in this browser” options.

Following these steps resets your ad ID, letting you surf the web without targeted advertisements.

Disable Cortana

Voice-controlled digital assistants have become big business. Microsoft aims to capitalize on this market with Cortana, an incredibly resourceful built-in assistant that allows you to quickly set reminders, schedule events, and send emails, among many other intuitive features. However, the way it uses the information it collects can become overbearing at times. Here’s how to disable Cortana:

  1. Type “Task Manager” in the search box, or use the keyboard shortcut Ctrl + Shift + Esc.
  2. In Task Manager, click the Startup tab and find Cortana in the list of programs.
  3. Right-click the row and click Disable.
  4. Open the Start menu, then find Cortana under All Apps.
  5. Right-click on Cortana, select More, and click on App settings.
  6. Toggle the switch under “Runs at log-in.”

Once disabled, the Cortana option disappears and you’re now left with just a search bar, which you can use to search for things online or on your desktop.

Stop peer-to-peer file sharing

With peer-to-peer or P2P file sharing enabled, Windows 10 shares downloaded updates to your PC with other Windows 10 users in the same network by default. This helps other users update their systems faster and speeds up your upgrade downloads. However, if you are unhappy with your files being used by other users, you can turn P2P sharing off.

  1. Click the Windows icon and head over to Settings.
  2. Click on Update and Security then choose Delivery Optimization from the sidebar.
  3. Under “Allow downloads from other PCs,” switch the toggle to “Off.”

If you want to share your files with PCs on your in-house network only, leave this option on and select the option that says “PCs on my local network.” For more detailed instructions on how to stop P2P updates, click here.

Blunt Microsoft’s Edge

Microsoft Edge is chock-full of features — such as Cortana Integration and typing prediction — that send data back to Microsoft. To turn off these intrusive functionalities, open Edge and click on the three dots in the far right corner.

Then, click on Settings > Cookies and site permissions. There you have the option to disable a bunch of settings, such as those related to ads, automatic downloads, and location sharing.

These simple security tips will stop Microsoft from tracking your online activities for good. Don’t hesitate to contact us today for all matters security-related.

If you are looking for an expert to help you find the best solutions for your business talk to GCInfotech about a free technology assessment

Published with consideration from TechAdvisory.org SOURCE

Like it or not, there will come a time when your once lightning-fast Mac computer can no longer meet modern computing demands. When this happens, you’ll face the following dilemma: should you stick to your current Mac computer or purchase a new one? To help you make this decision, we’ve listed several signs you need to watch out for.

Your device can’t support the latest macOS version

Apple releases a new version of macOS every September or October. Typically, Mac models from the past several years are supported. So if your device can’t update to the latest version, it’s a sign that you need to have your Mac replaced.

The latest macOS version that’s currently in public beta is 12 Monterey. Here are the following Mac models that support the update:

  • MacBook (early 2016 and later)
  • MacBook Air (early 2015 and later)
  • MacBook Pro (early 2015 and later)
  • iMac (late 2015 and later)
  • iMac Pro (2017 and later)
  • Mac Pro (late 2013 and later)
  • Mac mini (late 2014 and later)

This means that devices made earlier than those in the list cannot install macOS Monterey. For instance, a 2010 Macbook Pro running Mac OS X Lion cannot support the upcoming version of macOS. Your device is likely obsolete, and while you can keep on using it as usual, you won’t get any new features and its slow performance may cause productivity issues.

You’ve run out of free space

File sizes are constantly growing, which means that they are bound to take up more space in computer hard drives. If your Mac only has 128 or 256 GB of storage space, you’ll find yourself freeing up space for new files often. You have the option to purchase flash drives or external hard drives, but these aren’t built into your system, so the chances of losing them are high.

It’s therefore more ideal to purchase a new Mac instead. Newer versions offer as much as 4TB of storage, which will allow you to store more files in the long run.

Your Mac has poor specs

If frozen screens, slow-loading apps, and poor battery life are already a part of your typical day while using your Mac, then it might be time to replace it.

For instance, the performance of a hard disk drive (HDD) slows down with age, which could cause your computer to load files and programs sluggishly. The same principle applies to your battery. You may experience short standby and usage times, or the device could suddenly turn off. There’s the option of plugging your device into an outlet while using it, but this sacrifices portability.

To mitigate these issues, you can add more random access memory (RAM), swap out the HDD, or replace the battery. It’s important to note that some components are soldered to the motherboard, so replacing them may not be an option. The money you would spend on upgrading your Mac would be better put toward a new machine, which will not only be faster, but also much more reliable.

Your Mac’s hardware is damaged

You need to replace your Mac if it has suffered serious physical damage. This could range from a broken display, damaged hard drives, missing keyboard keys, or nonfunctioning USB and charging ports.

It’s easy to have your device fixed, but it’s not the most financially sound decision to invest money in an obsolete machine when you can buy a new one that will last longer. Also, small issues can become major problems. Let’s say you’re using your Mac with a heavily cracked screen. The device might be usable for a while, but the display might stop functioning anytime, which is a major hindrance if you’re in the middle of something important.

If problems on your Mac are already affecting your productivity, consider replacing it with a newer version that performs much better and has no hardware damage.

You’re experiencing software issues

An outdated Mac can experience software problems such as unresponsive apps, visual glitches, and random shutdowns. If your Mac is running an older version of macOS, it might run into software compatibility issues. For instance, a program may refuse to run because your operating system is outdated.

You can usually fix these problems by freeing up your RAM or storage space. Reinstalling macOS is also a good option. If the problems persist, however, you should consider investing in a new Mac.

It’s important to have a Mac that not only performs well, but also helps you become more productive and efficient. If you want to learn more about replacing your Mac, drop our experts a line today and we’ll be in touch.

If you are looking for an expert to help you find the best solutions for your business talk to GCInfotech about a free technology assessment

Published with consideration from TechAdvisory.org SOURCE

Apple security threats

The hearsay that Macs cannot be infected by viruses or malware couldn’t be further from the truth. There are plenty of cyberthreats that pose risks to Macs, so if you’re a Mac user, you should prioritize your device’s security. The good news is that protecting your Mac is simple and easy. Just follow these steps.

Check your privacy settings

Make sure that your Mac settings are set up properly to keep your data safe. Manage the information your Mac makes available across the internet or on a network by going to Apple menu System Preferences Security & Privacy Privacy. From there, you can choose which information to share and with whom. For example, you can specify which apps are allowed to see personal information, such as your location, contacts, photos, or music.

Take advantage of the firewall

A firewall protects your Mac from unwanted contact initiated by other computers on a network or the internet. It protects your computer by allowing only authorized services and apps to communicate with your Mac, so be sure to enable macOS’s built-in firewall.

To do so, just go to Apple menu System Preferences Security & Privacy Privacy then, click Firewall. If the padlock icon at the bottom left is locked, click it and key in your username and password. Enable the firewall by clicking Turn On Firewall.

To modify Firewall settings, click on Firewall Options… just below the “Turn Off Firewall” button. You will find a list of services and apps that are allowed to receive inbound connections. If you want to add an app or service to the list, just click the “+” button below the list itself. However, we recommend keeping this list as short as possible, as the apps listed can be exploited by cybercriminals.

Another useful feature to enable is stealth mode. This option will make your Mac more difficult to find, thus keeping hackers and malware at bay. For instance, if you are in a coffee shop and connected to its unsecured Wi-Fi, enabling stealth mode will make your Mac invisible on that public network. To turn on this feature, just tick the box next to “Enable stealth mode” in Firewall Options. A dialog box will pop up, and you can click on the “Enable Stealth Mode” button.

Set up a firmware password

Every new Mac today has the FileVault encryption automatically enabled. This means that your device already encrypts the hard drive by default, and the only way your data can be accessed is by logging in. Keep in mind, though, that this feature won’t necessarily save your account in case someone reinstalls the operating system or uses a memory stick to boot the Mac and remove all data from your hard disk.

To increase protection, set up a firmware password. Do this by restarting your computer, then pressing and holding down Cmd+R before the Apple logo shows up on the screen. You can let go of the keys once the progress bar pops up.

When the utilities window appears, click on Utilities in the menu bar, then choose Startup Security Utility or Firmware Password Utility. Click on Turn On Firmware Password… and simply follow the succeeding instructions.

Finally, quit the utilities window, then choose Apple menu Restart. Make sure to never forget or misplace your firmware password, because only Apple technicians can recover it.

Ensure that your confidential data remains private by performing minor tweaks on your Mac’s system settings. It takes only a few minutes to ensure lasting online protection. If setting up a firewall or firmware password sounds a little too advanced for you, or if you need to set up more advanced defenses, don’t hesitate to get in touch with our experts.

To learn more about how to safeguard your business, or if you are looking for an expert to help you find the best solutions for your business talk to GCInfotech about a free technology assessment.

Published with consideration from TechAdvisory.org SOURCE